back Navigating Images
Learn about advanced ways to navigate the images in the image annotation tool.
You've already learned the basic mechanisms of how to navigate around an image in the getting started section. You can zoom and move the image similar to interactive maps and you can switch to the previous or next image using the backward or forward buttons in the toolbar at the bottom. Now let's focus on the more advanced ways to navigate images.
Image Filtering/Sorting
If you are familiar with the volume overview, you will have noticed the image filter and sorting functions. The image filter can be used to display only certain images of a volume, e.g. only images containing annotations. The image sorting can be used to shuffle the image randomly or sort them in some other way.
The sequence of filtered and sorted images in the volume overview is always directly transferred to the image annotation tool. If you have an active filtering in the volume overview and open the image annotation tool, you will now cycle through only the images that were displayed in the volume overview and not just all images of the volume.
Minimap
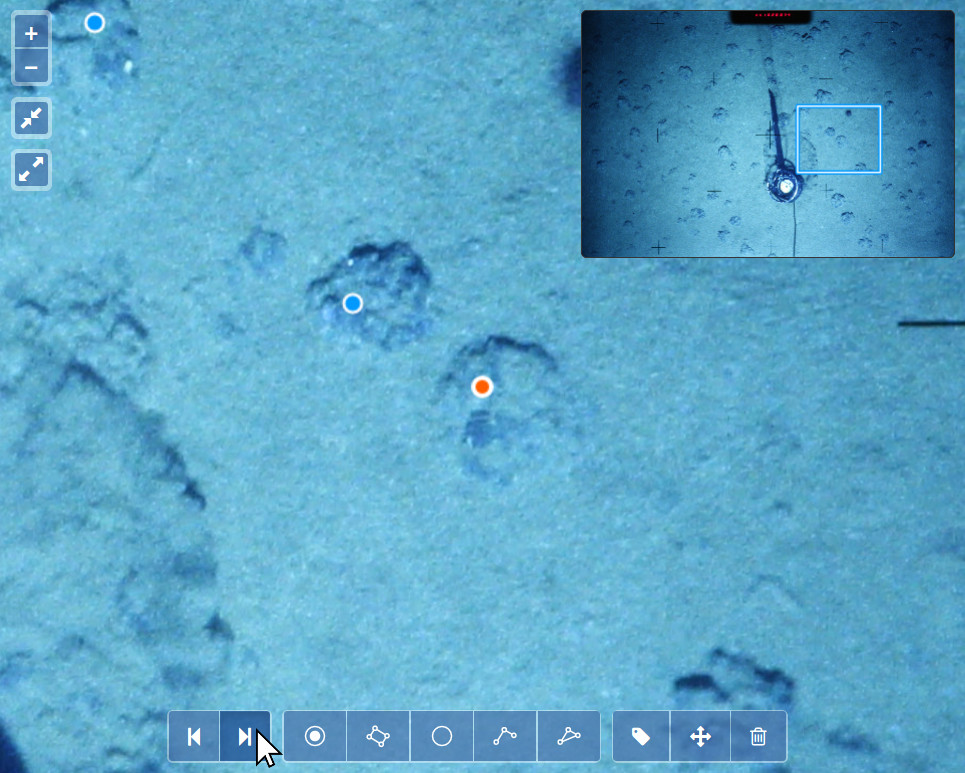
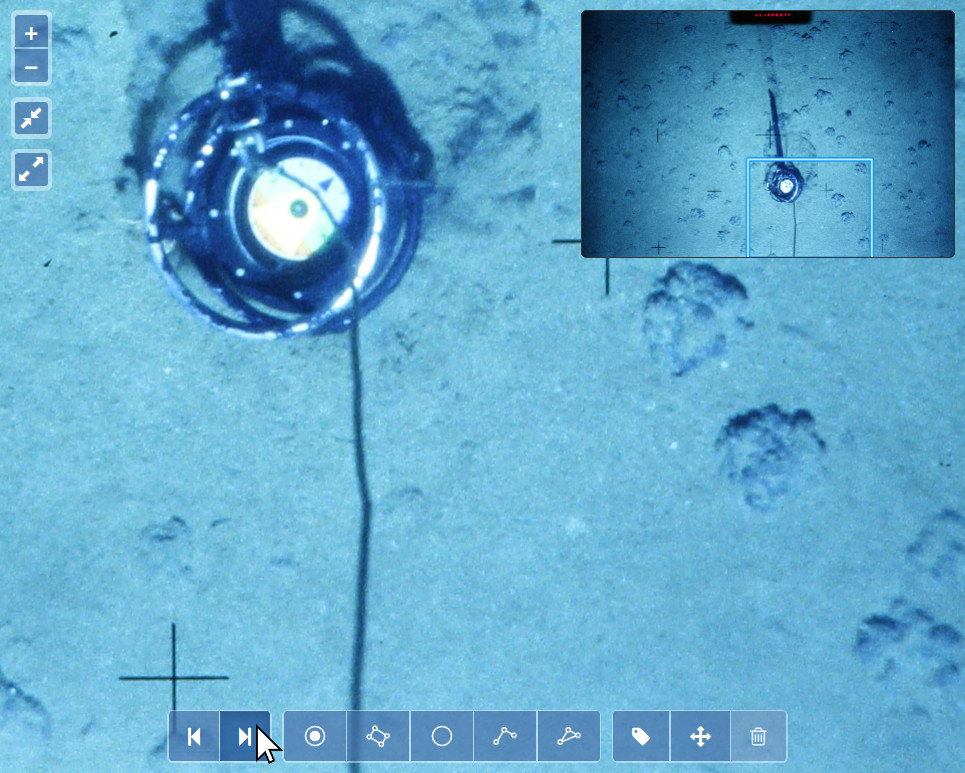
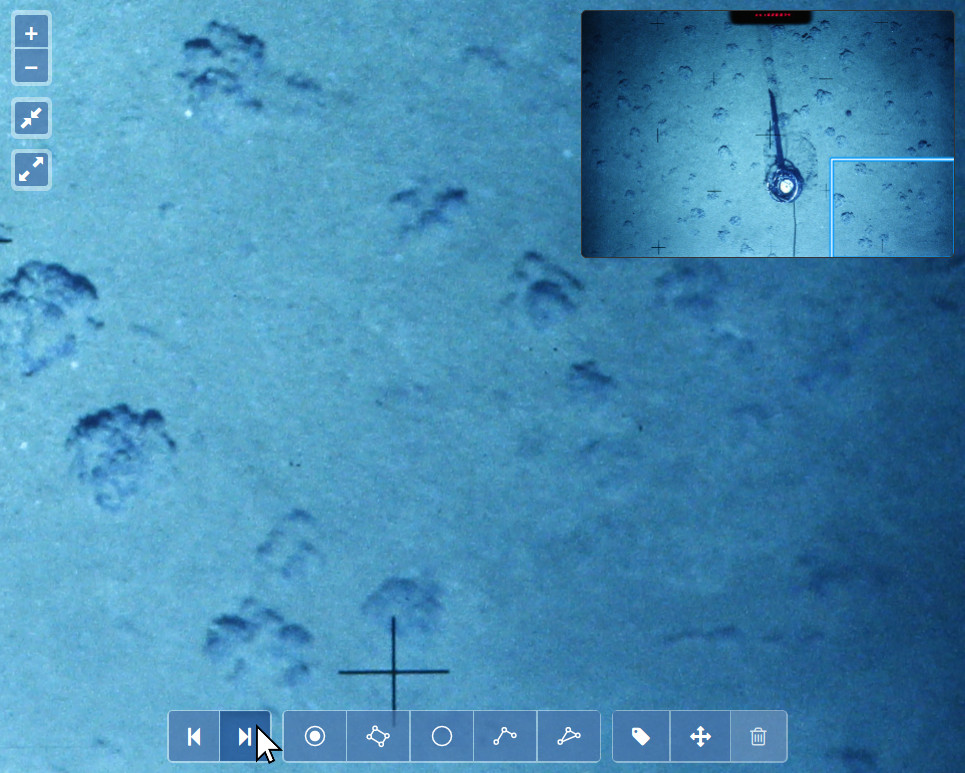
At the top right of the image annotation tool there is the minimap. It does not only highlight your current viewport on the image but you can also use it to move the viewport or quickly jump around. Drag the highlighted viewport in the minimap around to move it or click on a location in the minimap to immediately center your viewport on this point.
Zoom To Extent And Original Resolution
At the top left of the image annotation tool there are the zoom to extent and zoom to original resolution buttons. Zoom to extent modifies your viewport so that the whole image is shown in the center. This is the same view as when you initially open the image annotation tool. Zoom to original resolution zooms the image in or out until it has its original size, i.e. one pixel of the image maps to one pixel of your monitor.
Annotation Modes
In addition to cycling back and forth between images, the image annotation tool offers special annotation modes. You can find and activate them in the annotation modes tab in the sidebar.
Volume Label Review
Volume label review (Volare) allows you to quickly cycle through all annotations of a volume. When Volare is activated, your viewport will jump to the first annotation of the current image and select it. If there is no annotation, it will zoom out to show the whole image. You can now advance through annotations with the forward and backward buttons or the shortcut keys. If the last annotation of an image is displayed and you hit the forward button, the image annotation tool will switch to the first annotation of the next image.


You can use Volare to quickly attach labels to an annotation, too. Just press the button in the annotation modes tab or hit enter to attach your currently selected label to the currently highlighted annotation.
Volare works great with the annotation filter if you want to review only specific annotations.
Lawnmower Mode
Lawnmower Mode can be used to quickly and methodically screen all areas of an image at a larger resolution that fits on your monitor. Before you activate Lawnmower Mode, first choose the zoom level on which you want to screen the image. When Lawnmower Mode is activated, your viewport will jump to the first "tile", the bottom left section of the image that fits in your viewport at the current zoom level. Now you can advance through image tiles with the forward and backward buttons or the shortcut keys. If the last tile is displayed and you hit the forward button, the image annotation tool will switch to the first tile of the next image. This way you can quickly screen all images of a volume.

Random Sampling
Random sampling mode allows you to create a specific number of annotations at random locations for each image. Before you activate random sampling mode, first choose the number of random samples per image in the annotation modes tab. When random sampling mode is activated, your viewport will jump to the first random location on the image. The location is marked with a small circle symbol so you can zoom or move the image even while the random sampling mode is activated. To create an annotation at the current location, press the button in the annotation modes tab or hit enter. To cycle forward/backward between random locations, use the forward and backward buttons or the shortcut keys.
Note that the random locations for each image are remembered until you leave the image annotation tool. This means that, if you deactivate and activate random sampling mode, you will get the same random locations for an image. To get a new set of random locations, reload the image annotation tool.
Regular Sampling
Regular sampling mode behaves very similar to random sampling mode. Instead of random locations, this annotation mode will choose the locations as a regular grid spanning the whole image. Before you activate regular sampling mode, first choose the number of rows and columns of the grid in the annotation modes tab. You can then cycle forward/backward between the locations of the regular grid and create new annotations just like with random sampling mode.